Category: Web Security

  • How to Prevent Session Fixation Attacks in Web Apps

    How to Prevent Session Fixation Attacks in Web Apps

    A successful login should never turn an old anonymous session into a trusted authenticated session without changing its identity. When I review authentication flows, that is one of the first checks I make. Understanding How to prevent session fixation attacks starts with one rule: generate a fresh session identifier whenever the user’s trust level changes.

    Session fixation differs from classic session hijacking. Instead of stealing a session after login, an attacker gets a known session identifier accepted before authentication. The victim then logs in using it. If the application keeps that identifier, the attacker may reuse it as an authenticated session. OWASP describes this unchanged pre-login and post-login session value as the core weakness behind session fixation.

    How Session Fixation Attacks Actually Work

    How Session Fixation Attacks Actually Work

    Imagine an online account creates session ABC123 for an anonymous visitor.

    An attacker obtains that valid session and gets a victim’s browser to use it. The victim then enters valid credentials.

    The vulnerable flow looks like this:

    Anonymous ABC123 → Login → Authenticated ABC123

    The attacker already knows ABC123. If the server now associates that same identifier with the victim’s authenticated account, the attacker may gain access.

    The secure flow is different:

    Anonymous ABC123 → Login → Authenticated X9K72P

    The old session identifier becomes useless.

    This distinction matters because HTTPS alone cannot correct poor session lifecycle management. OWASP states that session ID regeneration is mandatory for preventing session fixation.

    Regenerate Session IDs After Authentication

    Regenerate Session IDs After Authentication

    The strongest direct defense is also straightforward: destroy or invalidate the previous identifier and create a new unpredictable one after successful authentication.

    I treat authentication as a hard security boundary.

    Rotate the Session During Login

    Never authenticate an existing anonymous identifier in place.

    Instead, the application should authenticate the credentials, issue a new session identifier, associate authentication state with the new session, and invalidate the previous identifier.

    Use your framework’s native session-regeneration function where possible. OWASP recommends framework-provided session management rather than homemade identifiers. If custom IDs are unavoidable, it recommends a cryptographically secure pseudorandom generator with at least 128 bits.

    My preferred design looks like this:

    Guest session → authentication → ID rotation → authenticated session

    That single transition breaks the attacker’s knowledge of the session.

    Rotate Sessions After Other Trust Changes

    Login is not the only boundary that matters.

    I also rotate session identifiers after MFA verification, password changes, account recovery, administrative elevation, and significant privilege changes.

    That creates a useful engineering rule: when trust increases, session identity changes.

    This is the original test I use during reviews because developers often protect login but overlook later privilege transitions.

    Harden Session Cookies Against Browser-Side Attacks

    Harden Session Cookies Against Browser-Side Attacks

    Session rotation addresses fixation directly. Cookie controls reduce the number of ways an attacker can manipulate, expose, or misuse sessions.

    A hardened session cookie can resemble:

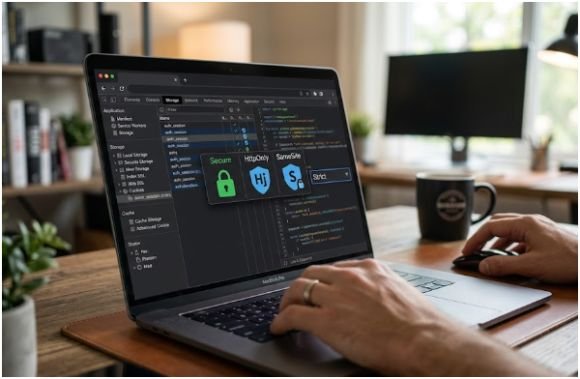
    Set-Cookie: __Host-session=RANDOM_VALUE; Path=/; Secure; HttpOnly; SameSite=Lax

    MDN recommends restricting cookie access and documents Secure, HttpOnly, and SameSite as important controls. The __Host- prefix adds stricter requirements in supporting browsers: the cookie must use HTTPS, must have Path=/, and cannot specify Domain.

    Use Secure and HttpOnly

    Secure prevents browsers from transmitting the session cookie through ordinary HTTP.

    HttpOnly prevents JavaScript from reading the cookie through document.cookie. That limits session theft if an XSS weakness exists, although it does not make XSS harmless.

    Choose an Appropriate SameSite Policy

    SameSite controls when browsers attach cookies to cross-site requests.

    Strict provides stronger isolation but can disrupt legitimate cross-site flows. Lax often provides a practical baseline. Applications that genuinely require SameSite=None must also use Secure.

    These cookie settings complement the best HTTP security headers for websites, especially HSTS and Content-Security-Policy. They should form part of the same browser-security strategy.

    Force HTTPS Across the Entire Session

    Force HTTPS Across the Entire Session

    Protecting only the login page is insufficient.

    I use HTTPS from the first anonymous request through logout. OWASP recommends TLS for the entire web session because unencrypted traffic can expose or allow manipulation of session identifiers. It also recommends the Secure cookie attribute and notes that HSTS can strengthen HTTPS enforcement.

    This matters because an attacker who can manipulate an unencrypted connection may attempt to influence the victim’s session before authentication occurs.

    HTTPS protects transport. Session regeneration protects identity. You need both.

    Reject Session IDs Your Application Never Issued

    One overlooked defense is refusing arbitrary session identifiers.

    An application should not accept a random ID supplied by a client and silently convert it into a valid session.

    OWASP recommends rejecting identifiers the application never generated. Receiving one can also be treated as suspicious activity worth logging.

    This reduces an attacker’s ability to choose or inject a convenient identifier.

    Avoid transporting session IDs through URLs as well. URLs can expose identifiers through browser history, logs, bookmarks, analytics systems, Referer data, and shared links. OWASP specifically identifies URL-based identifiers as an additional disclosure and fixation risk.

    Add Session Expiration and Server-Side Invalidation

    Rotation is strongest when the old session actually dies.

    Deleting a browser cookie without invalidating the server-side session can leave an active credential behind.

    I recommend server-enforced idle and absolute timeouts. Sensitive applications may also benefit from shorter sessions and reauthentication before high-risk actions.

    Logout should terminate the server-side session rather than simply remove the local cookie.

    This creates three layers:

    Control What It Accomplishes
    Session regeneration Makes the attacker’s known ID obsolete
    Secure cookie settings Restricts exposure and manipulation
    Server-side expiration Limits how long stolen sessions remain useful
    HTTPS and HSTS Protect session transport
    Session validation Rejects unknown or malformed identifiers

    No single row should replace the others.

    How I Implement Session Fixation Protection

    I use a simple sequence when reviewing an application.

    First, I capture the session identifier before login. I authenticate normally and compare the identifier afterward. They must differ.

    Next, I test the old identifier. The server should reject it or treat it as unauthenticated.

    I repeat the test after MFA, privilege elevation, password resets, and other sensitive identity transitions.

    Then I inspect the session cookie. I verify Secure, HttpOnly, a suitable SameSite policy, tight scope, and HTTPS-only transport.

    Finally, I confirm that session identifiers cannot travel through query strings or other unnecessary channels.

    OWASP’s Web Security Testing Guide uses the same central test: determine whether session cookies remain unchanged before and after successful authentication.

    Common Session Fixation Prevention Mistakes

    The biggest mistake I see is assuming secure cookie attributes solve fixation.

    They don’t.

    HttpOnly makes cookie theft through JavaScript harder. Secure protects transport. SameSite limits certain cross-site requests. None automatically replaces a known pre-login identifier after authentication.

    Another mistake is generating a new cookie while leaving the old authenticated server session active. Rotation must invalidate the previous credential.

    Developers should also avoid predictable identifiers. OWASP recommends meaningless, unpredictable session IDs, while MITRE catalogs session fixation as CWE-384.

    The real defense comes from controlling the entire session lifecycle.

    Make the Old Session Useless—Problem Solved

    The cleanest answer to How to prevent session fixation attacks isn’t another security plugin or complicated detection rule. It is disciplined session lifecycle management.

    When authentication succeeds, replace the session identifier. When privileges increase, rotate it again. Protect the new credential with HTTPS and hardened cookies, reject identifiers you didn’t issue, and invalidate sessions properly at logout.

    My next step after implementing these controls is always the same: capture the session before and after login. If the identifier survives authentication unchanged, I treat that as a security defect until proven otherwise.

    Frequently Asked Questions

    1. Can HTTPS prevent session fixation attacks by itself?

    No. HTTPS protects session data in transit, but applications still need to regenerate session IDs after authentication.

    2. When should a website regenerate a session ID?

    Regenerate it after login and after major trust changes such as MFA, password recovery, or privilege elevation.

    3. Does SameSite prevent session fixation?

    Not by itself. SameSite limits certain cross-site cookie behaviors but does not replace session rotation after authentication.

    4. What is the best way to test how to prevent session fixation attacks?

    Compare session IDs before and after login, then confirm the old identifier cannot access the authenticated account.


  • How to Create a Content Security Policy That Works

    How to Create a Content Security Policy That Works

    The hardest part of learning how to create a content security policy is not writing the header. It is deciding exactly what your website should trust without breaking features your users depend on.

    I have found that CSP works best when I treat it as an allowlist that becomes stricter over time. Starting with an oversized policy defeats much of its value. Starting too aggressively can break analytics, payments, fonts, images, or application requests.

    A better approach is to discover what the site uses, test restrictions safely, then enforce only what has been verified.

    What a Content Security Policy Actually Controls

    What a Content Security Policy Actually Controls

    A Content Security Policy, or CSP, tells browsers which sources may provide scripts, styles, images, frames, fonts, and network connections.

    The browser receives those rules through the Content-Security-Policy HTTP response header. It then blocks resources that violate them.

    This matters because many Cross-Site Scripting attacks depend on getting unauthorized JavaScript to execute. A strong CSP can stop that script even when another vulnerability exists.

    MDN describes CSP as an added security layer designed to detect and mitigate attacks such as XSS and data injection. OWASP also recommends CSP as defense in depth rather than a replacement for secure coding.

    CSP should therefore sit beside secure cookies, input handling, output encoding, authentication controls, and measures that prevent session fixation attacks.

    How to Create a Content Security Policy Step by Step

    How to Create a Content Security Policy Step by Step

    My preferred method for how to create a content security policy is progressive tightening. I do not begin by guessing which domains should be trusted.

    Step 1: Inventory Every Resource Your Pages Load

    First, I identify everything a typical page requests.

    That includes JavaScript bundles, CSS files, fonts, images, API connections, analytics platforms, payment services, embedded videos, and third-party frames.

    Browser developer tools make this easier. The Network panel reveals requests that are easy to overlook.

    Pay special attention to services such as Google Analytics, Google Tag Manager, Stripe, YouTube, external CDNs, and hosted font providers.

    This inventory becomes the foundation of the policy.

    Step 2: Build a Restrictive CSP Baseline

    When I am deciding how to create a content security policy, I prefer to begin with narrow permissions instead of broad wildcards.

    A restrictive starting point might look like this:

    Content-Security-Policy: default-src ‘none’; script-src ‘self’; connect-src ‘self’; img-src ‘self’; style-src ‘self’; frame-ancestors ‘none’; form-action ‘self’;

    default-src ‘none’ blocks resources unless another directive allows them.

    script-src ‘self’ permits JavaScript from the same origin. connect-src ‘self’ controls connections such as Fetch, XMLHttpRequest, and WebSockets.

    frame-ancestors ‘none’ prevents other sites from embedding the page in a frame. This also provides protection against many clickjacking scenarios.

    form-action ‘self’ limits where forms can submit data.

    Step 3: Allow Only Required Third-Party Sources

    Real websites rarely use only first-party resources.

    Suppose my site loads its own scripts but uses an approved analytics provider and an external image host. I can expand specific directives instead of relaxing the entire policy.

    For example:

    Content-Security-Policy: default-src ‘self’; script-src ‘self’ https://analytics.example.com; img-src ‘self’ https://images.example.com; frame-ancestors ‘none’;

    The key principle is precision.

    I avoid policies such as script-src https: because they can trust far more sources than intended. A CSP becomes weaker every time broad permissions are added for convenience.

    Step 4: Test With Content-Security-Policy-Report-Only

    One lesson I learned quickly about how to create a content security policy is that production should not be the testing environment.

    A strict policy may silently block a checkout script or stop an API request. That can turn a security improvement into a revenue problem.

    Instead, I deploy:

    Content-Security-Policy-Report-Only: …

    Report-Only mode records violations without enforcing the restrictions.

    I then test important user journeys such as login, registration, checkout, search, contact forms, video playback, dashboards, and account settings.

    Violations can appear in browser developer tools. For larger sites, CSP reports can also be sent to a reporting endpoint.

    My practical rule is simple: do not whitelist a blocked source merely because it generated a violation. First determine why the browser requested it.

    That distinction helps uncover forgotten third-party scripts and unwanted dependencies.

    Step 5: Replace unsafe-inline With Nonces

    Step 5 Replace unsafe-inline With Nonces

    Inline JavaScript creates one of the biggest CSP challenges.

    Adding ‘unsafe-inline’ may make errors disappear, but it also weakens script protection.

    I prefer nonces.

    A server generates a random value for each response and includes it in the policy:

    Content-Security-Policy: script-src ‘self’ ‘nonce-R4nd0mSt21ng’;

    The same nonce appears on an approved inline script:

    <script nonce=”R4nd0mSt21ng”>

      console.log(“Approved script”);

    </script>

    Only scripts carrying the matching nonce can execute.

    In real deployments, the nonce must be cryptographically unpredictable and generated separately for each response. It should never be hard-coded like the demonstration value above.

    Step 6: Deploy CSP Through HTTP Headers

    Although CSP can be configured with an HTML <meta> element, I normally use HTTP response headers.

    Headers provide broader directive support and keep security configuration at the server or application layer.

    For Nginx:

    add_header Content-Security-Policy “default-src ‘self’; script-src ‘self’;”;

    For Apache:

    Header set Content-Security-Policy “default-src ‘self’; script-src ‘self’;”

    Frameworks can also generate CSP headers. Next.js, for example, supports response header configuration through its application configuration.

    Regardless of platform, learning how to create a content security policy also means confirming that the header appears on every relevant response.

    Step 7: Monitor Violations After Enforcement

    CSP is not a configure-once feature.

    New analytics tools, payment providers, widgets, marketing tags, or application features can introduce new resource origins.

    I review CSP violations whenever major frontend changes are released.

    That turns the policy into a living inventory of what the application trusts.

    A Practical CSP Example

    Here is a simple scenario I use to explain how to create a content security policy without overcomplicating it.

    Imagine a site needs its own JavaScript and CSS, images from its own domain, API calls to its own backend, and no embedded frames.

    A sensible starting policy could be:

    Content-Security-Policy: default-src ‘self’; script-src ‘self’; style-src ‘self’; img-src ‘self’; connect-src ‘self’; frame-ancestors ‘none’; form-action ‘self’; object-src ‘none’;

    Now imagine marketing adds an analytics provider.

    I would not broaden default-src. I would add the required analytics origin only to the appropriate directive.

    That is the central security habit: widen the smallest possible part of the policy.

    Common Content Security Policy Mistakes

    The most common mistake I see when people research how to create a content security policy is copying someone else’s header.

    Their dependencies are not your dependencies.

    Another problem is relying heavily on *, https:, ‘unsafe-inline’, or ‘unsafe-eval’. These values may make deployment easier, but they can remove protections the CSP was supposed to provide.

    I also avoid enforcing a complex policy before Report-Only testing.

    Finally, CSP should not create false confidence. It does not repair vulnerable application code. You still need output encoding, secure authentication, protected cookies, safe dependency management, and server-side validation.

    Frequently Asked Questions

    1. What is the easiest way to learn how to create a content security policy?

    Start with a resource inventory, create restrictive directives, deploy them in Report-Only mode, investigate violations, then enforce the verified policy.

    2. Should I use default-src ‘self’ in CSP?

    It is a useful starting fallback, but dedicated directives such as script-src, connect-src, frame-ancestors, and form-action give you finer control.

    3. Should I use unsafe-inline in a Content Security Policy?

    Avoid it for scripts when possible. Nonces or hashes allow approved inline code without granting permission to every inline script.

    4. Can a Content Security Policy completely prevent XSS?

    No. CSP provides powerful defense in depth, but secure coding, output encoding, validation, dependency security, and other XSS protections are still required.

    Lock It Down Without Breaking Everything

    When I approach how to create a content security policy, I focus less on producing the longest header and more on minimizing trust.

    Inventory your dependencies. Start restrictive. Test with Report-Only. Investigate every violation. Replace unsafe inline scripts with nonces where practical. Then enforce the policy and continue monitoring it.

    The best CSP is not the one that looks impressive in a security scanner. It is the one that permits exactly what your application needs and very little else.

    Your next step is simple: open your site’s Network panel, list every external resource it loads, and use that inventory to draft your first Report-Only policy.

  • Best HTTP Security Headers For Websites

    Best HTTP Security Headers For Websites

    The fastest security improvement I usually make on a new website doesn’t involve changing application code. I configure the browser to protect users before any JavaScript executes. That’s exactly why the Best HTTP security headers for websites deserve attention. A few properly configured response headers can stop common attacks, reduce information leakage, and significantly improve browser-side security with very little overhead.

    I’ve deployed these headers on production websites, APIs, and web applications. One lesson stands out every time: security headers work best as a team rather than individual protections.

    Why HTTP Security Headers Matter More Than Ever

    Why HTTP Security Headers Matter More Than Ever


    Every browser trusts instructions sent by the web server. HTTP response headers tell the browser what it should load, what it should block, and how it should handle sensitive information.

    Without these instructions, browsers often fall back to permissive behavior. That leaves websites more vulnerable to Cross-Site Scripting (XSS), clickjacking, MIME sniffing, mixed-content problems, and unnecessary exposure of user information.

    Instead of relying entirely on application code, security headers provide an additional defensive layer that works before many attacks even begin.

    Essential HTTP Security Headers Every Website Should Use

    The following headers provide the strongest baseline protection for most websites.

    Header Protects Against Recommended Value
    Content-Security-Policy XSS, injection, clickjacking default-src ‘self’; object-src ‘none’; frame-ancestors ‘none’;
    Strict-Transport-Security HTTPS downgrade attacks max-age=31536000; includeSubDomains; preload
    X-Content-Type-Options MIME sniffing nosniff
    X-Frame-Options Clickjacking DENY or SAMEORIGIN
    Referrer-Policy Information leakage strict-origin-when-cross-origin
    Permissions-Policy Browser feature abuse Disable unused APIs

    Content-Security-Policy (CSP)

    Content Security Policy is arguably the most powerful browser security header available.

    Instead of allowing scripts from anywhere, CSP creates a whitelist of trusted sources. If malicious JavaScript appears through an XSS vulnerability, the browser refuses to execute it.

    A strong starting policy looks like this:

    default-src ‘self’;

    object-src ‘none’;

    frame-ancestors ‘none’;

    For modern applications, I recommend gradually tightening CSP using nonces or hashes instead of allowing inline scripts.

    Strict-Transport-Security (HSTS)

    Strict-Transport-Security (HSTS)

    HSTS forces browsers to communicate only through HTTPS.

    Without it, attackers may attempt SSL stripping attacks that downgrade encrypted connections.

    A common configuration is:

    max-age=31536000;

    includeSubDomains;

    preload

    Only enable preload after confirming every subdomain supports HTTPS.

    X-Content-Type-Options

    Browsers sometimes try to guess a file’s content type instead of trusting the server.

    Attackers can abuse this behavior.

    Setting:

    nosniff

    prevents MIME sniffing and forces browsers to respect the declared Content-Type.

    X-Frame-Options

    Clickjacking tricks users into interacting with invisible pages loaded inside malicious iframes.

    This header prevents your pages from being embedded elsewhere.

    Typical values include:

    DENY

    or

    SAMEORIGIN

    Modern browsers prefer the frame-ancestors directive within CSP, but keeping X-Frame-Options improves compatibility with older browsers.

    You should also understand how to prevent clickjacking on websites because CSP and X-Frame-Options complement each other rather than compete.

    Referrer-Policy

    Every time users click another website, browsers may send the previous page’s address.

    Sometimes that URL contains sensitive information.

    I generally recommend:

    strict-origin-when-cross-origin

    It preserves useful analytics while minimizing unnecessary data exposure.

    Permissions-Policy

    Modern browsers expose hardware features such as cameras, microphones, geolocation, accelerometers, and payment APIs.

    Most websites never need access to these capabilities.

    A restrictive policy might look like:

    camera=(),

    microphone=(),

    geolocation=()

    Reducing available browser features lowers the attack surface significantly.

    Advanced Cross-Origin Security Headers

    Advanced Cross-Origin Security Headers

    Modern web applications increasingly rely on APIs, embedded resources, and multiple origins. These headers strengthen browser isolation.

    Cross-Origin-Opener-Policy (COOP)

    COOP isolates browsing contexts and prevents unrelated pages from sharing the same process.

    Recommended value:

    same-origin

    This reduces several cross-window attacks.

    Cross-Origin-Resource-Policy (CORP)

    CORP controls which websites can request your resources.

    A common baseline is:

    same-origin

    This prevents unauthorized cross-origin loading.

    Cross-Origin-Embedder-Policy (COEP)

    COEP requires embedded resources to explicitly allow cross-origin usage.

    Recommended setting:

    require-corp

    WebAssembly applications and advanced browser features frequently require this header.

    How I Configure HTTP Security Headers Safely

    I always deploy headers in staging before production because restrictive policies can unintentionally block legitimate resources.

    Nginx Example

    add_header Content-Security-Policy “default-src ‘self’; object-src ‘none’; frame-ancestors ‘none’;” always;

    add_header Strict-Transport-Security “max-age=31536000; includeSubDomains; preload” always;

    add_header X-Content-Type-Options “nosniff” always;

    add_header X-Frame-Options “DENY” always;

    add_header Referrer-Policy “strict-origin-when-cross-origin” always;

    add_header Permissions-Policy “camera=(), microphone=(), geolocation=()” always;

    Apache Example

    Header always set Content-Security-Policy “default-src ‘self’; object-src ‘none’; frame-ancestors ‘none’;”

    Header always set Strict-Transport-Security “max-age=31536000; includeSubDomains; preload”

    Header always set X-Content-Type-Options “nosniff”

    Header always set X-Frame-Options “DENY”

    Header always set Referrer-Policy “strict-origin-when-cross-origin”

    Header always set Permissions-Policy “camera=(), microphone=(), geolocation=()”

    Common Mistakes That Can Break Your Website

    One mistake I frequently see is deploying an overly restrictive Content Security Policy without testing external scripts.

    Analytics, CDNs, payment providers, fonts, and embedded videos often stop working immediately.

    Another common error is enabling HSTS before every subdomain supports HTTPS. Users may become permanently locked out of unsecured subdomains.

    Disabling browser permissions without reviewing application requirements can also unexpectedly disable features such as webcams or location services.

    My rule is simple: start restrictive, test thoroughly, then tighten further after monitoring reports.

    How to Test Your HTTP Security Headers

    After deployment, verify every response instead of assuming configuration files loaded correctly.

    Open your browser’s Developer Tools and inspect the Network tab. Select a request and confirm each security header appears in the response.

    I also validate websites using trusted header scanners to identify missing protections or configuration weaknesses.

    Useful references include:

    • Mozilla Web Security Guidelines
    • OWASP Secure Headers Project
    • Security Headers by Scott Helme
    • Google Web Fundamentals documentation

    These tools provide actionable recommendations without requiring penetration testing expertise.

    Don’t Leave Your Headers Half-Finished

    Security headers aren’t magic, but they’re among the highest-return security improvements I’ve implemented. They strengthen browser behavior before attackers can exploit many common weaknesses, and they require relatively little maintenance once properly configured.

    My advice is to begin with the essential headers, validate them carefully, then introduce advanced cross-origin isolation as your application evolves. Small configuration changes today can eliminate major security risks tomorrow.

    Frequently Asked Questions

    1. What are the best HTTP security headers for websites?

    Content-Security-Policy, HSTS, X-Content-Type-Options, X-Frame-Options, Referrer-Policy, and Permissions-Policy provide the strongest baseline.

    2. Can HTTP security headers prevent XSS attacks?

    Content-Security-Policy significantly reduces XSS risk by restricting trusted content sources.

    3. Should every website enable HSTS?

    Yes, once the entire website and all required subdomains consistently support HTTPS.

    4. How do I verify HTTP security headers are working?

    Use your browser’s Developer Tools or trusted scanners like Mozilla Observatory or Security Headers.

  • How to Prevent Clickjacking on Websites

    How to Prevent Clickjacking on Websites

    A visitor clicks a harmless-looking button, but an invisible page captures the action. That single click could change an email address, approve a payment, or alter an account setting.

    When I assess how to prevent clickjacking on websites, I never depend on one control. I use Content Security Policy as the main defense, retain a legacy header, secure session cookies, and test every sensitive route.

    What Is a Clickjacking Attack?

    Clickjacking is a user-interface attack in which a malicious site places another webpage inside a transparent or disguised frame. The victim believes they are clicking the visible page. Their click actually reaches a button or link on the framed website.

    OWASP describes this technique as a UI redress attack. Attackers use transparent or opaque layers to redirect clicks toward another application or domain.

    A successful attack often requires three conditions:

    • The target page can load inside an iframe.
    • The victim has an active session on the target site.
    • The framed page contains an action worth triggering.

    Account settings, administrative panels, checkout screens, and consent controls deserve close attention.

    How to Prevent Clickjacking on Websites With Layered Defenses

    How to Prevent Clickjacking on Websites With Layered Defenses

    The strongest approach removes the attacker’s ability to frame sensitive pages. Supporting controls then reduce risk if a configuration gap remains.

    1. Block Unauthorized Framing With CSP

    The frame-ancestors directive in Content Security Policy should be my first control. It tells the browser which parent pages may embed a document.

    To block every site from framing a page, I use:

    Content-Security-Policy: frame-ancestors ‘none’;

    For pages that must appear inside frames on the same origin, I use:

    Content-Security-Policy: frame-ancestors ‘self’;

    A legitimate partner can be added explicitly:

    Content-Security-Policy: frame-ancestors ‘self’ https://trustedpartner.example;

    OWASP recommends frame-ancestors because it can authorize multiple permitted origins through CSP rules. MDN also identifies it as an effective defense because clickjacking depends on embedding the target document.

    I send this policy through the HTTP response header. The directive does not work when placed inside a CSP <meta> element. It also does not inherit from default-src, so I must declare it directly.

    2. Add X-Frame-Options for Legacy Support

    2. Add X-Frame-Options for Legacy Support

    I also send X-Frame-Options when a page does not require complex partner framing. It provides fallback protection for browsers or systems that do not enforce modern CSP rules correctly.

    Two valid directives remain useful:

    X-Frame-Options: DENY

    DENY blocks framing from every origin, including the website’s own origin.

    X-Frame-Options: SAMEORIGIN

    SAMEORIGIN permits framing only when the parent shares the same origin.

    MDN confirms that the header controls rendering inside frame, iframe, embed, and object elements. I avoid the obsolete ALLOW-FROM directive because modern browsers do not support it consistently.

    For a page that should never be framed, I pair the headers:

    Content-Security-Policy: frame-ancestors ‘none’;

    X-Frame-Options: DENY

    For same-origin framing, I use:

    Content-Security-Policy: frame-ancestors ‘self’;

    X-Frame-Options: SAMEORIGIN

    3. Protect Session Cookies With SameSite

    Clickjacking becomes more damaging when the framed page recognizes an authenticated user. A session cookie may allow the hidden action to run with the victim’s permissions.

    I configure session cookies like this when the application permits strict same-site behavior:

    Set-Cookie: session_id=xyz123; Secure; HttpOnly; SameSite=Strict

    SameSite=Strict provides the strongest cross-site restriction but may interrupt legitimate external sign-in or navigation flows. SameSite=Lax is often a more practical choice for ordinary web sessions.

    MDN recommends Lax or Strict session cookies as part of its clickjacking defense checklist. However, I treat SameSite as supporting protection, not a replacement for framing controls.

    Cookie security also depends on HTTPS. Teams dealing with cookie or transport errors should know how to fix mixed content warnings before enforcing production settings across the application.

    4. Use Frame-Busting Code Only as a Fallback

    4. Use Frame-Busting Code Only as a Fallback

    JavaScript frame-busting detects whether a page is running as the top-level document. A basic script may hide the page until it confirms that no parent frame exists.

    <style id=”antiClickjack”>

      body { display: none !important; }

    </style>

    <script>

      if (self === top) {

        document.getElementById(“antiClickjack”).remove();

      } else {

        top.location = self.location;

      }

    </script>

    I use this only when an old environment cannot process the required headers. Attackers may disable scripts, restrict top-level navigation, or use iframe sandbox settings to weaken JavaScript defenses.

    Security headers are enforced by the browser outside the page’s script context. That makes them more dependable than frame-busting code.

    A Practical Clickjacking Protection Example

    Consider an application with public articles, an account dashboard, and a payment widget embedded by one approved partner.

    Applying one global DENY rule would protect the dashboard but break the payment integration. Allowing all framing would keep the widget working but expose the account area.

    I would separate the policies by route:

    /account/*

    Content-Security-Policy: frame-ancestors ‘none’;

    X-Frame-Options: DENY

    /payments/widget

    Content-Security-Policy: frame-ancestors https://checkout.partner.example;

    /articles/*

    Content-Security-Policy: frame-ancestors ‘self’;

    X-Frame-Options: SAMEORIGIN

    This route-based model is my preferred original safeguard. It protects sensitive actions without forcing every page into the same framing rule.

    How to Configure Clickjacking Headers

    How to Configure Clickjacking Headers

    The header must appear on the final HTML response. Adding it only to static assets, redirect responses, or selected templates leaves gaps.

    Apache Configuration

    Header always set Content-Security-Policy “frame-ancestors ‘none’;”

    Header always set X-Frame-Options “DENY”

    The mod_headers module must be enabled. I use always so error responses also receive the headers where supported.

    Nginx Configuration

    add_header Content-Security-Policy “frame-ancestors ‘none’;” always;

    add_header X-Frame-Options “DENY” always;

    After editing the configuration, I validate it before reloading Nginx.

    Application-Level Configuration

    Applications can set the headers through middleware. This approach works well when public, administrative, and embedded routes require different policies.

    I still inspect the final response because a reverse proxy, CDN, load balancer, or hosting platform may remove or overwrite application headers.

    How to Test Your Clickjacking Protection

    Knowing how to prevent clickjacking on websites includes proving that the browser rejects unauthorized frames.

    I begin by inspecting the response:

    curl -I https://example.com/account

    The output should contain the intended CSP and X-Frame-Options values.

    Next, I create a local test page:

    <!doctype html>

    <html lang=”en”>

    <body>

      <iframe

        src=”https://example.com/account”

        width=”900″

        height=”600″>

      </iframe>

    </body>

    </html>

    I open the page from an unauthorized origin and check the browser console. The protected document should not render.

    I then repeat the test for every approved integration. This second test matters. A policy can stop attackers while also blocking a legitimate checkout, support portal, or embedded dashboard.

    My release check covers:

    • Logged-in and logged-out routes
    • Error and authentication pages
    • Mobile and desktop browsers
    • CDN-served and origin-served responses
    • Authorized partner frames
    • Nested frames with multiple ancestors

    CSP checks every ancestor in a nested frame chain. If one ancestor is not permitted, the browser cancels the load.

    Common Clickjacking Prevention Mistakes

    The first mistake is setting frame-src instead of frame-ancestors. frame-src controls which framed content your page may load. It does not control who may frame your page.

    Another mistake is placing frame-ancestors in a meta tag. Browsers require it in the HTTP response header.

    I also avoid applying protection only to the home page. Attackers usually target authenticated actions, not marketing pages.

    Finally, I do not describe SameSite cookies or JavaScript as complete clickjacking solutions. They reduce exposure but do not replace browser-enforced framing restrictions.

    Frequently Asked Questions

    1. What CSP directive prevents clickjacking?

    Use Content-Security-Policy: frame-ancestors ‘none’; to block all framing or ‘self’ to permit only same-origin framing.

    2. Is X-Frame-Options still necessary?

    It remains a useful fallback, but CSP frame-ancestors offers better control and should serve as the primary defense.

    3. Can SameSite cookies stop clickjacking?

    SameSite cookies can limit authenticated cross-site requests, but they cannot replace CSP and X-Frame-Options headers.

    4. How can I check whether my website is vulnerable?

    Embed a sensitive page from another origin and inspect its response headers, browser console, authenticated routes, and approved integrations.

    Lock the Frame Before Attackers Steal the Show

    The practical answer to how to prevent clickjacking on websites is layered enforcement. I begin with CSP frame-ancestors, add a compatible X-Frame-Options value, protect session cookies, and reserve JavaScript for legacy fallback use.

    My final step is always route-by-route testing. Check your account, checkout, administration, and consent pages first. One missing header on a sensitive endpoint can undermine an otherwise strong configuration.

  • How to Fix Mixed Content Warnings Without Breaking Sites

    How to Fix Mixed Content Warnings Without Breaking Sites

    Your SSL certificate may be valid while your website still appears insecure. The usual cause is one forgotten image, script, font, stylesheet, iframe, or API request loading through HTTP.

    When I troubleshoot this issue, I do not begin by adding another redirect. I first identify the exact insecure request, confirm that an HTTPS version exists, and repair the URL at its source. That approach is the safest way to learn how to fix mixed content warnings without hiding the real problem.

    What Causes Mixed Content Warnings?

    Mixed content occurs when the main webpage loads over HTTPS but requests another resource through an insecure protocol, usually HTTP. That resource may be visible in the HTML, generated by a plugin, stored in a database, or inserted by JavaScript.

    Browsers treat insecure resources differently. Some images or media files may be automatically upgraded to HTTPS. More dangerous resources, including scripts and iframes, may be blocked because they can alter the page or expose visitor data.

    A browser upgrade does not mean the underlying problem is fixed. The original HTTP URL may still exist in your code, database, cache, or third-party integration.

    Quick Mixed Content Repair Guide

    Warning source Where to check Best permanent fix
    Image or video HTML, CSS, media library Replace HTTP URL with HTTPS or a relative path
    CSS or JavaScript Theme, plugin, template, bundle Update the source file and rebuild cached assets
    WordPress content Posts, widgets, options, page-builder data Back up, run a controlled database replacement, then clear caches
    External widget Embed code or tag manager Use the provider’s HTTPS URL or replace the provider
    CDN asset CDN settings and cached HTML Correct the origin URL, enable HTTPS, and purge the CDN
    API or iframe Application code Move the endpoint to HTTPS or remove the integration

    How to Find Every Insecure Resource

    How to Find Every Insecure Resource

    Check the Browser Console

    Open the affected page in Chrome, Edge, or Firefox. Press F12, select Console, and reload the page.

    Mixed content messages normally show the secure page URL and the insecure resource URL. Copy each HTTP address into a working list. Do not repair only the first warning because one page may contain several insecure requests.

    I also test more than the homepage. Product pages, blog posts, checkout screens, forms, landing pages, and account areas often load different templates and scripts.

    Inspect the Network and Security Panels

    Open the Network panel, reload the page, and filter requests by http://. Check whether the browser upgraded, redirected, or blocked each request.

    The Security panel can also reveal certificate and resource problems. Chrome DevTools provides network and security inspection features that help trace how individual assets load.

    Search the Website Source and Database

    View the rendered page source and search for http://. Then inspect the theme, templates, CSS files, JavaScript files, tag manager, widgets, and database.

    This step matters because browser warnings show the failed resource, not always the system that created it. An HTTP image could come from a page builder, a CSS background rule, a cached plugin file, or structured data.

    How to Fix Mixed Content Warnings Step by Step

    How to Fix Mixed Content Warnings Step by Step

    Confirm the HTTP Resource Supports HTTPS

    Before replacing a URL, open its HTTPS version directly.

    For example, change:

    http://cdn.example.com/image.jpg

    to:

    https://cdn.example.com/image.jpg

    If the HTTPS file loads correctly, update the source reference. If it fails, find another secure host or serve the file from your own HTTPS-enabled domain.

    Blindly changing every string from HTTP to HTTPS can break old APIs, abandoned widgets, or external files that never supported encryption.

    Repair Hardcoded URLs

    Search your HTML, templates, CSS, and JavaScript for insecure absolute paths.

    Replace:

    http://example.com/assets/logo.png

    with:

    https://example.com/assets/logo.png

    For assets hosted on the same website, I usually prefer a root-relative path:

    /assets/logo.png

    Relative paths reduce the risk of future protocol mismatches. I avoid protocol-relative URLs such as //example.com/file.js in modern projects because explicit HTTPS is clearer and safer.

    After changing source files, rebuild compiled CSS or JavaScript bundles when required.

    Fix Mixed Content in WordPress

    WordPress migrations often leave old HTTP addresses inside posts, media records, widgets, page-builder content, custom fields, and plugin options.

    First, open Settings > General. Confirm that both the WordPress Address and Site Address begin with https://.

    Next, back up the database. Use a trusted search-and-replace tool to replace the exact old domain:

    http://example.com

    with:

    https://example.com

    Run a dry test first. Do not perform a broad replacement of every http:// string because external links may not support HTTPS.

    WordPress also lists plugins that can address insecure content, but I treat them as diagnostic or transitional tools. A source-level database or code correction remains easier to maintain.

    Once HTTPS is stable, strengthen session handling and browser protections by configuring secure cookie settings.

    Replace Insecure Third-Party Resources

    External chat tools, advertising scripts, maps, fonts, video players, analytics tags, and embedded forms can trigger mixed content.

    Check the provider’s current documentation for an HTTPS embed. If none exists, remove the resource, self-host it when licensing permits, or choose another provider.

    Do not download and host third-party scripts without checking permissions and update requirements. Self-hosting an outdated security-sensitive script may create a larger risk than the original warning.

    Correct CDN and Server Settings

    A server redirect moves page requests from HTTP to HTTPS, but it does not automatically repair every HTTP URL embedded within the page.

    Cloudflare states that forcing HTTPS alone does not resolve all mixed content. The page must still use HTTPS or suitable relative resource links.

    Cloudflare’s Automatic HTTPS Rewrites feature can rewrite eligible HTTP resources when secure versions exist. It can help with CMS content and assets outside your direct control. However, it should support a permanent repair, not replace one.

    After changing CDN or server rules, purge the CDN cache, application cache, page cache, and browser cache.

    Use Content Security Policy Carefully

    Use Content Security Policy Carefully

    A Content Security Policy can upgrade insecure requests with this directive:

    Content-Security-Policy: upgrade-insecure-requests

    This instructs supporting browsers to request HTTP resources through HTTPS. It can be useful during a controlled migration, but it does not make an unavailable HTTPS resource work.

    I deploy the header in report-only or staging conditions first. Then I check scripts, fonts, APIs, images, and iframes for failures.

    Do not rely on the deprecated block-all-mixed-content directive as a modern primary strategy. MDN documents upgrade-insecure-requests as the relevant upgrade mechanism and notes that older mixed-content directives have changed or been deprecated.

    How to Verify the Repair

    When testing how to fix mixed content warnings, I use a five-layer verification process:

    1. Clear the website, plugin, server, and CDN caches.
    2. Open the page in a private browser window.
    3. Check the Console for mixed content messages.
    4. Filter the Network panel for http://.
    5. test several page templates, forms, embeds, and mobile layouts.

    My useful rule is simple: a padlock is evidence, not the entire test. A page can display a secure icon while an automatically upgraded image still hides an outdated HTTP reference.

    Worked Diagnostic Example

    I once traced a warning to a background image that did not appear in the HTML. The console identified an HTTP image, but searching the page editor found nothing.

    The URL was stored inside a generated CSS file created by a page builder. I updated the original design setting, regenerated the CSS, cleared the page cache, and purged the CDN. Editing the generated file alone would have failed because the builder recreated it during the next update.

    That is why I trace each warning back to its generating source.

    Common Mixed Content Fixes That Fail

    Installing an SSL certificate does not update embedded URLs.

    Adding a 301 redirect may secure page navigation, but browsers can still block insecure subresources before a redirect solves the request.

    A plugin may rewrite visible output while leaving old database values untouched.

    Automatic HTTPS upgrades may conceal stale references that later fail in another browser, integration, or security policy.

    Replacing every http:// string without testing can break external APIs and downloadable resources.

    Frequently Asked Questions

    1. Why does mixed content remain after installing SSL?

    SSL secures the main connection, but old HTTP resource URLs may still remain in your code, database, plugins, CSS, or external embeds.

    2. Can a redirect fix mixed content warnings?

    A redirect helps move visitors to HTTPS, but you must still update embedded images, scripts, stylesheets, iframes, APIs, and fonts.

    3. How do I fix mixed content in WordPress?

    Update both site URLs, back up the database, replace old domain-specific HTTP paths, regenerate builder files, and clear every cache layer.

    4. Does mixed content affect website security?

    Yes. Insecure resources may be intercepted or modified, while browsers may block scripts and other active content to protect visitors.

    Padlock Restored, Crisis Cancelled

    The best answer to how to fix mixed content warnings is not another cosmetic patch. Find the insecure request, identify where it was generated, confirm HTTPS support, and repair the original reference.

    Start with the browser console. Fix one resource category at a time, clear every cache, and retest the page in a private window. Once the console stays clean across your key templates, your HTTPS migration is finally complete.

  • How to Configure Secure Cookie Settings: Full Guide

    How to Configure Secure Cookie Settings: Full Guide

    A weak session cookie can undermine an otherwise well-built login system. When I review an application, I check its cookies before studying complex security controls because one missing attribute can expose a session token.

    Knowing how to configure secure cookie settings means deciding where a cookie travels, who can read it, and how long it remains valid. The strongest configuration gives each cookie only the access it needs.

    Why Secure Cookie Configuration Matters

    Browsers attach matching cookies to requests automatically. That behavior makes sessions convenient, but it also creates risk when a cookie has excessive scope.

    An authentication cookie sent over HTTP may be intercepted. A cookie available to JavaScript may be stolen during a cross-site scripting attack. A cookie sent with cross-site requests may also support certain cross-site request forgery attacks.

    Secure cookie attributes reduce those risks. However, no single attribute solves every problem. OWASP recommends protecting session cookies with controls such as Secure, HttpOnly, and an explicit SameSite policy.

    I treat the cookie as one layer in a larger session security plan. It should work alongside HTTPS, CSRF protection, input handling, session rotation, and the practices to prevent session hijacking attacks.

    Start With a Secure Set-Cookie Header

    Start With a Secure Set-Cookie Header

    The server should issue sensitive cookies through the Set-Cookie response header. I avoid placing authentication tokens in JavaScript-readable storage unless the application architecture leaves no safer option.

    A strong starting point looks like this:

    Set-Cookie: __Host-session=RANDOM_VALUE; Secure; HttpOnly; SameSite=Lax; Max-Age=3600; Path=/

    This example creates a host-bound cookie, limits its lifetime to one hour, blocks JavaScript access, and prevents transmission over ordinary HTTP.

    Add the Secure Attribute

    The Secure attribute tells the browser to send the cookie only through an HTTPS connection. It helps prevent a session identifier from traveling as clear text over an unencrypted request.

    Set-Cookie: session=RANDOM_VALUE; Secure

    I enable HTTPS across the entire production site before setting this attribute. Redirecting HTTP traffic helps, but the application should not depend on a redirect to protect a cookie already sent over an insecure connection.

    Block Script Access With HttpOnly

    HttpOnly prevents browser scripts from reading the cookie through interfaces such as document.cookie.

    Set-Cookie: session=RANDOM_VALUE; Secure; HttpOnly

    This control can make session-token theft harder during an XSS incident. However, it does not stop malicious scripts from changing the page or sending authenticated requests from the victim’s browser.

    That distinction matters. I use HttpOnly for session cookies, but I never present it as a replacement for XSS prevention.

    Select the Correct SameSite Policy

    The SameSite attribute controls when browsers include a cookie in cross-site requests.

    SameSite=Strict offers the tightest restriction. It suits applications that do not need authentication cookies during navigation from external sites.

    SameSite=Lax allows some top-level navigation while blocking many cross-site subrequests. I often begin with Lax because it provides useful protection without breaking common navigation patterns.

    SameSite=None permits cross-site use. It is usually necessary for certain embedded tools, federated workflows, or cross-site applications. Browsers require cookies using SameSite=None to include Secure.

    Do not select None merely to fix a login problem. First identify which cross-site request failed and why.

    Control Cookie Lifetime and Scope

    Cookie security is also about limiting exposure.

    Use Max-Age or Expires to prevent sensitive cookies from persisting indefinitely. A one-hour example is:

    Max-Age=3600

    A short cookie lifetime does not automatically end a server-side session. The server must enforce its own idle and absolute timeouts.

    I also avoid broad Domain values. A cookie with Domain=example.com may be available to matching subdomains. That scope becomes risky when a subdomain is compromised or controlled by another service. OWASP specifically warns against unnecessarily sharing cookies across subdomains.

    Set Path as narrowly as the application allows. However, do not treat Path as a strong isolation boundary. It controls when a cookie is sent, not whether another application on the same host can necessarily influence it.

    Use Hardened Cookie Name Prefixes

    Use Hardened Cookie Name Prefixes

    Developers learning how to configure secure cookie settings often stop after adding three attributes. Cookie prefixes add another useful browser-enforced safeguard.

    Choose the __Host- Prefix for Session Cookies

    I prefer __Host- for host-specific authentication cookies.

    A browser accepts a __Host- cookie only when it:

    • Uses Secure
    • Has Path=/
    • Has no Domain attribute
    • Comes from a secure HTTPS origin

    Set-Cookie: __Host-session=RANDOM_VALUE; Secure; HttpOnly; SameSite=Lax; Path=/

    These restrictions keep the cookie bound to the host that created it. They also prevent a subdomain from setting a broader cookie with the same name.

    Use __Secure- When Domain Sharing Is Required

    The __Secure- prefix requires the cookie to use Secure and originate from HTTPS.

    Set-Cookie: __Secure-session=RANDOM_VALUE; Secure; HttpOnly; SameSite=Lax

    It does not prohibit the Domain attribute. Therefore, it offers less isolation than __Host-.

    My rule is simple: use __Host- unless the architecture has a documented need to share the cookie across subdomains.

    How to Configure Secure Cookie Settings by Framework

    How to Configure Secure Cookie Settings by Framework

    Framework options can simplify configuration, but defaults vary. I verify the final response header rather than assuming a configuration object produced the intended cookie.

    Node.js and Express

    app.set(“trust proxy”, 1);

    app.use(session({

      secret: process.env.SESSION_SECRET,

      resave: false,

      saveUninitialized: false,

      name: “__Host-session”,

      cookie: {

        secure: true,

        httpOnly: true,

        sameSite: “lax”,

        maxAge: 60 * 60 * 1000,

        path: “/”

      }

    }));

    The trust proxy setting matters when Express runs behind a load balancer or reverse proxy that terminates HTTPS. Without correct proxy configuration, Express may treat the request as insecure and fail to issue the secure cookie. Express documents this deployment consideration in its session middleware guidance.

    Never hard-code the session secret in a public repository. Store it in a protected secret-management system or environment configuration.

    PHP

    PHP session defaults can be configured in php.ini:

    session.cookie_secure = 1

    session.cookie_httponly = 1

    session.cookie_samesite = “Lax”

    session.cookie_lifetime = 0

    They can also be applied before starting the session:

    session_set_cookie_params([

        ‘secure’ => true,

        ‘httponly’ => true,

        ‘samesite’ => ‘Lax’,

        ‘path’ => ‘/’

    ]);

    session_start();

    Set these options before session_start(). Then inspect the returned header to confirm the production server applied them.

    ASP.NET Core

    builder.Services

        .AddAuthentication()

        .AddCookie(options =>

        {

            options.Cookie.Name = “__Host-session”;

            options.Cookie.HttpOnly = true;

            options.Cookie.SecurePolicy = CookieSecurePolicy.Always;

            options.Cookie.SameSite = SameSiteMode.Lax;

            options.Cookie.Path = “/”;

            options.ExpireTimeSpan = TimeSpan.FromHours(1);

        });

    Some authentication flows require cross-site redirects. Microsoft notes that stricter SameSite settings can break OAuth and other cross-origin authentication processes. Test the full login and logout flow before enforcing Strict.

    Ruby on Rails

    Rails applications should force HTTPS in production:

    config.force_ssl = true

    A session-store configuration can define cookie behavior:

    Rails.application.config.session_store :cookie_store,

      key: “__Host-session”,

      secure: Rails.env.production?,

      httponly: true,

      same_site: :lax,

      path: “/”

    I keep development and production behavior close, but I do not weaken production cookies simply to accommodate a local HTTP setup.

    Avoid Common Cookie Configuration Mistakes

    The most common problem I find is a technically “secure” cookie with an unnecessarily broad scope.

    Another frequent failure involves setting SameSite=None without Secure. Modern browsers may reject that cookie. Developers then see inconsistent login behavior and blame the session library.

    Other mistakes include:

    • Adding a Domain attribute to a __Host- cookie
    • Assuming HttpOnly prevents every XSS consequence
    • Setting long-lived authentication cookies without server-side expiration
    • Using identical cookie names across development, staging, and production
    • Testing only direct login while ignoring OAuth callbacks and embedded content
    • Enabling Secure behind a proxy without configuring trusted proxy headers

    My original audit rule is the four-boundary test. For every sensitive cookie, I document its transport boundary, script boundary, site boundary, and time boundary. Those four checks map to Secure, HttpOnly, SameSite, and expiration controls.

    If I cannot explain why a cookie crosses one of those boundaries, I restrict it.

    Test Secure Cookies in Five Minutes

    After learning how to configure secure cookie settings, verify the browser’s actual behavior.

    Open the site over HTTPS and sign in. Press F12, then open the Application tab in Chrome or Edge. Firefox places similar information under Storage.

    Select the site under Cookies. Confirm the session cookie shows:

    • Secure enabled
    • HttpOnly enabled
    • The intended SameSite value
    • A suitable expiration
    • The narrowest practical domain
    • The correct path

    Next, open the Network panel and inspect the login response. Find the raw Set-Cookie header. This catches cases where middleware, a proxy, or a hosting platform rewrites the cookie.

    I also test three flows: direct login, navigation from an external site, and any federated login callback. That small test set exposes many SameSite mistakes before deployment.

    Frequently Asked Questions

    1. Which SameSite value is best for login cookies?

    Lax is a practical default for many login cookies, while Strict works when the application does not require cross-site authentication flows.

    2. Do Secure cookies work on localhost?

    Browser handling can differ during local development, so test production behavior on a real HTTPS staging environment rather than relying only on localhost.

    3. Can HttpOnly completely prevent XSS attacks?

    No. It blocks JavaScript from reading the cookie, but an injected script may still alter content or make authenticated requests.

    4. Should authentication cookies include a Domain attribute?

    Usually not. When deciding how to configure secure cookie settings, omit Domain unless documented subdomain sharing is necessary.

    Lock the Cookie Jar Before You Ship

    I do not judge cookie security by the framework configuration alone. I judge the Set-Cookie header that reaches the browser.

    Start with HTTPS, Secure, HttpOnly, and an explicit SameSite value. Limit the cookie’s lifespan and scope. Then use a __Host- prefix when the session does not need subdomain access.

    Finally, inspect the cookie in a staging browser and test every authentication path. Secure defaults are useful, but verification is what keeps a configuration mistake out of production.

  • How to Prevent Session Hijacking Attacks

    How to Prevent Session Hijacking Attacks

    A stolen password is dangerous, but a stolen session token can be worse. It may let an attacker enter an account without completing the login process again.

    When I assess how to prevent session hijacking attacks, I do not focus on one security feature. I protect the session token from creation through deletion. This lifecycle approach closes gaps that HTTPS, MFA, or secure cookies cannot fix alone.

    What Is a Session Hijacking Attack?

    Session hijacking happens when an attacker obtains or misuses a valid session identifier. The application may then treat the attacker as an authenticated user.

    Attackers can steal tokens through cross-site scripting, malware, phishing proxies, insecure networks, browser weaknesses, or exposed logs. Session fixation works differently. The attacker forces or predicts an identifier and waits for the victim to authenticate with it.

    OWASP recommends using unpredictable session identifiers and strict session management. Applications should reject identifiers they did not generate.

    Why MFA Alone Cannot Protect Active Sessions

    Why MFA Alone Cannot Protect Active Sessions

    MFA strengthens the login process. It does not automatically protect every request made after login.

    Once authentication succeeds, the browser usually sends a session cookie or access token with later requests. An attacker who steals that active credential may not face another MFA challenge.

    That distinction changed how I review login security. I treat authentication and session protection as connected but separate controls. Strong authentication reduces account takeover, while secure session management limits token theft and replay.

    Phishing-resistant cryptographic authentication remains valuable. NIST recommends phishing-resistant authenticators because they prevent authentication secrets from being disclosed to fraudulent websites.

    Teams should also know how to secure website login forms because unsafe authentication flows can expose sessions before protective controls begin.

    How to Prevent Session Hijacking Attacks

    How to Prevent Session Hijacking Attacks

    Encrypt Every Connection

    Serve the entire website through HTTPS, not only the login page. Otherwise, a session cookie could enter an unencrypted request after authentication.

    Use a current TLS configuration and redirect HTTP traffic to HTTPS. Add HTTP Strict Transport Security so compatible browsers continue using encrypted connections.

    Encryption blocks passive network sniffing, but it cannot stop malware or an XSS payload running inside the browser. That is why transport security must remain one layer of a larger system.

    Harden Session Cookies

    For cookie-based sessions, I start with three attributes:

    • Secure prevents the cookie from being sent through ordinary HTTP.
    • HttpOnly prevents JavaScript from reading the cookie through document.cookie.
    • SameSite controls when browsers include the cookie in cross-site requests.

    MDN recommends setting Secure and using HttpOnly for cookies that JavaScript does not need to access. It also advises setting SameSite explicitly for consistent browser behavior.

    Use SameSite=Strict when cross-site navigation is unnecessary. Lax often provides a more practical balance. Applications requiring SameSite=None must also use Secure.

    Cookie prefixes add another useful safeguard. A __Host- cookie must use HTTPS, have a root path, and exclude the Domain attribute. This limits overly broad cookie scope.

    Regenerate Session IDs

    Generate a new session identifier immediately after login. Regenerate it again after password changes, role upgrades, administrative elevation, or other privilege changes.

    This step prevents an identifier used before authentication from becoming a trusted authenticated session. It is one of the most direct defenses against session fixation.

    The old identifier must become invalid immediately. Keeping both identifiers active defeats the purpose of regeneration.

    Limit Session Lifetimes

    Sessions should not remain valid indefinitely. I normally apply both an idle timeout and an absolute expiration limit.

    The idle timeout closes a session after inactivity. The absolute limit ends it after a fixed period, even if the user remains active. Sensitive actions may require recent reauthentication before they proceed.

    Choose limits according to risk. A banking dashboard needs stricter controls than a low-risk content account. Avoid one timeout policy for every user and action.

    Rotate Refresh Tokens

    Rotate Refresh Tokens

    Refresh tokens deserve stronger protection because they can generate new access tokens. When a client uses one, issue a replacement and invalidate the previous token.

    If an invalidated token appears again, assume token reuse or theft. Revoke the token family and require authentication.

    Store token lineage, issue times, client identifiers, and revocation status. This gives your security team enough context to investigate replay attempts.

    Stop XSS and CSRF Attacks

    HttpOnly reduces direct cookie theft through JavaScript, but it does not make XSS harmless. A malicious script may still send authenticated requests from the victim’s browser.

    Use contextual output encoding, safe templating, input handling, and a restrictive Content Security Policy. Avoid inserting untrusted values into executable HTML or JavaScript contexts.

    For state-changing requests, combine SameSite cookies with anti-CSRF tokens and origin validation. SameSite is useful, but it should not become the only CSRF defense. OWASP explains that CSRF abuses a browser’s authenticated state to submit unwanted actions.

    Add Proof-of-Possession Protection

    Bearer tokens work like cash. Whoever possesses one may be able to use it.

    High-risk OAuth systems can use sender-constrained tokens through DPoP or mutual TLS. DPoP requires the client to prove possession of a private key when presenting a token. A copied token becomes less useful without that key.

    RFC 9449 defines DPoP as an application-layer proof-of-possession mechanism for sender-constraining OAuth 2.0 tokens.

    This control adds implementation complexity. I reserve it for sensitive APIs, financial systems, administrative tools, and environments where token replay creates serious damage.

    Detect Suspicious Session Changes

    Record enough session context to identify meaningful anomalies. Useful signals include impossible travel, new device characteristics, rapid location changes, token reuse, unusual request volume, and access to unfamiliar resources.

    Do not terminate every session because an IP address changes. Mobile users and corporate networks change addresses frequently. Instead, combine several signals into a risk score.

    OWASP notes that stolen-cookie use may produce changes in connection and environment information. These differences can help applications detect misuse.

    For medium-risk changes, require reauthentication. For strong evidence of theft, revoke the session and related tokens immediately.

    Destroy Sessions During Logout

    Logout must invalidate the server-side session, not simply remove a browser cookie. Otherwise, a copied token may remain usable until expiration.

    Clear the cookie with matching Path and Domain settings. Revoke associated refresh tokens and remove sensitive cached content where appropriate.

    Provide users with a “log out of all devices” option. This is especially helpful after phishing, malware infection, or a lost device.

    A Practical Session Security Example

    Consider an administrator who signs in, receives a cookie, and later opens the user-management panel.

    A weak application keeps the original session ID, allows it for several days, and relies only on MFA at login. An attacker who steals that cookie receives the same administrative access.

    A stronger flow issues a new session ID after login, sets a short idle timeout, and requires recent authentication before role changes. The cookie uses Secure, HttpOnly, and an appropriate SameSite value. Suspicious device changes trigger another verification step.

    My practical rule is simple: the more damaging the next action could be, the fresher and stronger the required proof should become. This “risk rises, proof rises” model provides better protection than treating every authenticated request equally.

    Session Hijacking Prevention for Users

    Users cannot repair weak server-side session management, but they can reduce exposure.

    Use passkeys or another phishing-resistant authentication method when available. Keep browsers, operating systems, and security tools updated. Avoid installing unknown extensions because malicious extensions may access browser data.

    Do not open sensitive accounts on shared devices. Avoid untrusted public Wi-Fi for financial or administrative work. A reputable VPN can protect traffic on an unsafe local network, although it cannot fix malware or a fraudulent website.

    Log out when finishing sensitive tasks. After suspected phishing or malware, revoke active sessions from the account’s security page. Changing the password alone may not invalidate every existing session.

    Frequently Asked Questions

    1. What is the best way to prevent session token theft?

    Use HTTPS, hardened cookies, XSS prevention, short session lifetimes, secure token storage, rotation, and server-side revocation together.

    2. Can HTTPS prevent all session hijacking attacks?

    No. HTTPS protects tokens during transit, but it cannot stop XSS, malware, phishing proxies, exposed logs, or weak session management.

    3. How do secure cookies help prevent session hijacking?

    Secure, HttpOnly, and SameSite limit unencrypted transmission, JavaScript access, and certain cross-site requests.

    4. How can users prevent session hijacking on public Wi-Fi?

    Avoid sensitive activity, use HTTPS, consider a trusted VPN, keep devices updated, and log out after completing the session.

    Lock the Door After Login

    Learning how to prevent session hijacking attacks starts with one important shift: successful login does not mean security work is finished.

    Protect tokens during transmission, storage, renewal, use, and destruction. Begin by auditing every session cookie and confirming that logout invalidates the server-side session. Then test session regeneration, expiration, token rotation, and suspicious-use detection.

    Passwords guard the entrance. Secure session management makes sure nobody slips through behind the authorized user.

  • How to Secure Website Login Forms: 9 Essential Steps

    How to Secure Website Login Forms: 9 Essential Steps

    A login form can look harmless while exposing passwords, sessions, and customer accounts. Learning how to secure website login forms means protecting much more than two input fields and a submit button.

    When I review authentication systems, I divide the login process into three security zones: the browser, the application server, and the authenticated session. A weakness in any zone can undermine every other control.

    Why Login Form Security Requires Several Layers

    Attackers do not rely on one technique. They may intercept unencrypted traffic, reuse leaked passwords, automate login attempts, steal session cookies, inject database commands, or discover valid usernames.

    That is why I use defense in depth. Each security control should limit the damage when another control fails. HTTPS protects credentials in transit, hashing protects stored passwords, and secure session controls protect users after authentication.

    OWASP’s 2025 authentication guidance recommends layered protections such as throttling, secure session management, failure logging, and safe cookie storage.

    Quick Website Login Security Checklist

    Security layer Recommended control Main risk reduced
    Network HTTPS and HSTS Credential interception
    Password storage Argon2id or bcrypt Password exposure after a breach
    Database access Parameterized queries SQL injection
    Login endpoint Rate limiting and bot detection Brute-force attacks
    Error handling Generic responses Account enumeration
    Form submission CSRF token Forged login requests
    Session cookie Secure, HttpOnly, SameSite Session theft and CSRF
    Session lifecycle ID regeneration and timeouts Session fixation and hijacking

    1. Encrypt Every Login Request With HTTPS

    Encrypt Every Login Request With HTTPS

    The first rule for how to secure website login forms is simple: never transmit credentials over an unencrypted connection. HTTPS creates an encrypted channel between the browser and server.

    Redirect every HTTP request to HTTPS. Do not protect only the login page. An unencrypted page elsewhere on the same site may still expose cookies or allow an attacker to redirect users.

    Enable HTTP Strict Transport Security after confirming that every required subdomain supports HTTPS. HSTS tells compatible browsers to use secure connections and reduces downgrade risks.

    TLS protects passwords while they travel. It does not protect them after they reach your server, so you still need secure storage and application controls.

    2. Store Passwords With Secure Hashing

    Store Passwords With Secure Hashing

    Never store passwords as plain text or reversible encrypted values. Store a one-way password hash created with a purpose-built password hashing function.

    OWASP recommends modern, memory-hard password hashing methods such as Argon2id. Bcrypt remains suitable for legacy systems when configured correctly. Fast general-purpose hashes, including plain SHA-256, are not appropriate for password storage.

    Use a unique salt for every password. Most reputable password libraries create and manage salts automatically. You may also use a separately stored pepper as an additional control.

    Do not hash passwords in browser-side JavaScript as a replacement for HTTPS. An attacker who steals that client-generated hash may replay it as though it were the original credential.

    3. Validate Inputs and Use Parameterized Queries

    Login inputs should be validated on the server. Client-side validation improves usability, but attackers can bypass it by sending requests directly to the endpoint.

    Check email or username length, allowed structure, encoding, and overall request size. Reject malformed values before they reach deeper application logic.

    For database queries, use parameterized statements or your framework’s safe query methods. Do not build SQL strings by joining raw login input.

    I avoid relying on vague “input sanitization” as the main SQL injection defense. Parameter binding keeps user data separate from executable database instructions.

    Output encoding also matters when a submitted username appears in an error page, audit screen, or administrative dashboard. Encode output for its specific HTML, attribute, JavaScript, or URL context.

    4. Stop Brute-Force and Credential-Stuffing Attacks

    Stop Brute-Force and Credential-Stuffing Attacks

    Rate limiting is essential when deciding how to secure website login forms against automated attacks. NIST requires verifiers to limit failed authentication attempts, while OWASP recommends delays, logging, and attack detection.

    Apply limits by account and by broader signals, such as IP address, device characteristics, and network reputation. An IP-only limit can block shared offices while distributed attackers continue across many addresses.

    A practical starting policy might allow several failed attempts before adding progressive delays. Avoid permanent account lockouts because attackers could intentionally lock other users out.

    Add CAPTCHA or bot challenges after suspicious behavior appears. Triggering a challenge for every visitor can reduce accessibility and frustrate legitimate users.

    Consider multifactor authentication for administrative accounts, financial actions, stored personal data, and other high-risk access.

    5. Prevent Account Enumeration

    A login form should not reveal whether an email address or username exists. Messages such as “Account not found” help attackers build lists of registered users.

    Use a generic response such as:

    “Invalid email or password.”

    Keep the visible response, HTTP behavior, and approximate processing time consistent for existing and nonexistent accounts. OWASP specifically recommends generic authentication responses to reduce user enumeration.

    Apply the same principle to password resets and account registration. A secure login page loses value when another endpoint exposes the entire user list.

    6. Protect Login Requests Against CSRF

    Cross-Site Request Forgery can force a browser to submit an unwanted request using the user’s existing cookies. Login CSRF may sign a victim into an attacker-controlled account, causing the victim to save private information in the wrong profile.

    Generate a cryptographically secure CSRF token, bind it to the user’s session, include it in the login request, and validate it on the server.

    The SameSite cookie attribute adds protection, but it should not replace a proper CSRF defense where forged requests present a meaningful risk. MDN describes SameSite as a defense-in-depth measure rather than a complete solution.

    7. Secure Authentication Cookies

    Secure Authentication Cookies

    After successful authentication, the session cookie becomes as sensitive as the password. An attacker who steals a valid session token may not need the user’s credentials.

    Configure authentication cookies with:

    • Secure so the browser sends them only through HTTPS
    • HttpOnly so ordinary client-side scripts cannot read them
    • SameSite=Lax or SameSite=Strict where application behavior allows it
    • A narrow Path and Domain scope
    • A limited lifetime

    MDN notes that HttpOnly cookies help protect session tokens from direct client-side access, while SameSite controls when cookies accompany cross-site requests.

    Do not place session identifiers in URLs. URLs can leak through browser history, analytics systems, logs, screenshots, and referrer headers.

    8. Regenerate and Expire User Sessions

    Regenerate the session identifier immediately after login. This breaks the connection between the anonymous pre-login session and the authenticated session.

    Without regeneration, an attacker may force or predict a session identifier before authentication and reuse it afterward. This attack is known as session fixation.

    Invalidate sessions after logout. Add both idle and absolute expiration times. A banking application may need short limits, while a low-risk content dashboard may allow longer sessions.

    When users change their password, lose a device, or report suspicious access, provide a method to revoke other active sessions.

    9. Design a Safer Login Form

    Secure frontend design improves both safety and usability. Use type=”password” so browsers visually obscure the password field. MDN confirms that password inputs are designed to conceal entered characters.

    Use meaningful autocomplete values:

    • autocomplete=”username” for the account identifier
    • autocomplete=”current-password” for an existing password
    • autocomplete=”new-password” when creating or changing a password

    Password-manager support helps users create and reuse fewer weak passwords. Do not disable paste, block password managers, or impose small maximum lengths.

    A show-password button can improve usability, but it should require a deliberate action and return to the masked state when appropriate.

    Test the Complete Login Flow

    My three-zone test checks more than whether valid credentials work.

    First, I inspect the browser zone. I verify HTTPS, form attributes, cookie flags, autocomplete behavior, and generic messages.

    Second, I inspect the server zone. I test rate limits, parameterized queries, password verification, CSRF validation, logging, and response consistency.

    Third, I inspect the session zone. I compare the session ID before and after login, test logout invalidation, confirm timeouts, and attempt to reuse expired tokens.

    This method often finds controls that look correct in isolation but fail during the full authentication sequence. A secure cookie provides little value when the server accepts an old session after logout.

    Frequently Asked Questions

    1. What is the safest way to store login passwords?

    Use a dedicated password hashing algorithm such as Argon2id with a unique salt, suitable cost settings, and a trusted server-side library.

    2. Should a login form use CAPTCHA?

    Use CAPTCHA or another bot challenge after suspicious activity appears rather than forcing every legitimate visitor to complete one.

    3. How many failed login attempts should a website allow?

    There is no universal number. Use progressive rate limits based on account risk, traffic patterns, device signals, and denial-of-service concerns.

    4. Do login forms need CSRF protection?

    Cookie-based login systems should assess login CSRF risk and use validated anti-CSRF tokens when forged authentication requests could harm users.

    Lock the Door Before Attackers Knock

    Knowing how to secure website login forms requires treating authentication as a complete system. HTTPS alone cannot protect weak password storage. Strong hashing cannot stop credential stuffing. Secure cookies cannot repair broken session handling.

    Start by testing one full login journey today. Record the session ID before login, authenticate, inspect the new cookie, log out, and attempt to reuse the old token. That small test can expose serious weaknesses before an attacker finds them.