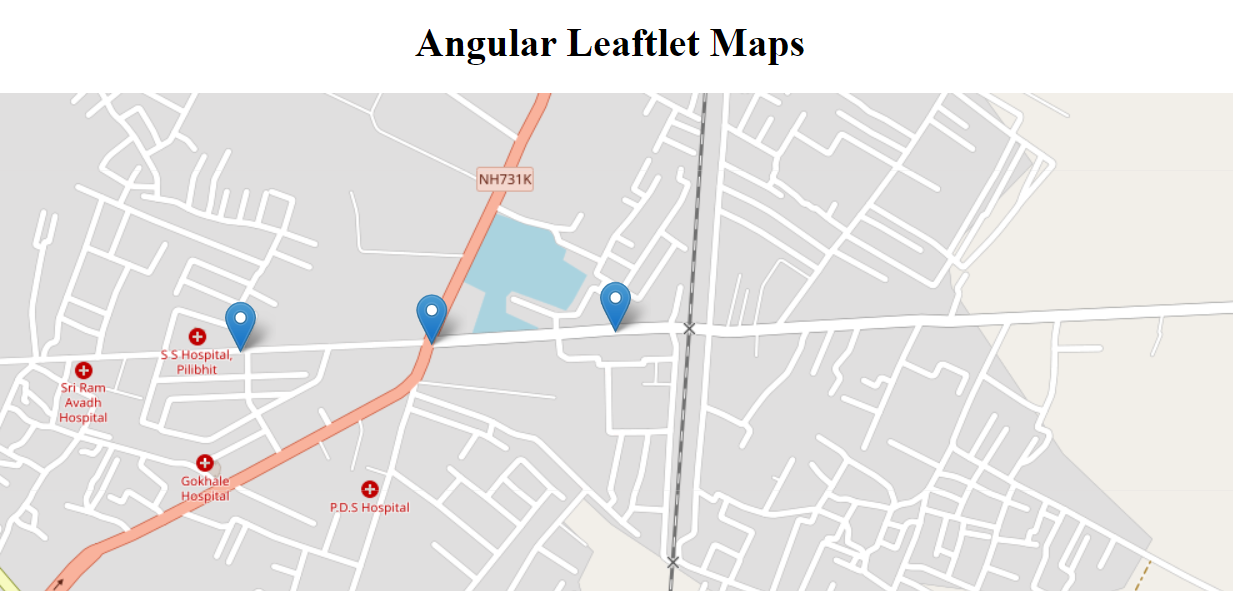
How To Integrate Leaflet Maps in Angular 2022
Leaflet is an open-source JavaScript library for mobile-friendly interactive maps. In this tutorial, we will integrate leaflet maps in angular using ngx-leaflet package.
1. Let's install @angular/cli package.
npm install -g @angular/cli2. Create a new angular project.
ng new angular-leaflet-mapscd angular-leaflet-maps3. Install leaflet, @asymmetrik/ngx-leaflet packages inside the project.
npm install leaflet @asymmetrik/ngx-leafletSupported Versions:-
Angular    @asymmetrik/ngx-leaflet          command
  15              15               npm i @asymmetrik/ngx-leaflet
  14              14               npm i @asymmetrik/ngx-leaflet@14
  13              13               npm i @asymmetrik/ngx-leaflet@13
  10              8                npm i @asymmetrik/ngx-leaflet@8
  9               7                npm i @asymmetrik/ngx-leaflet@7
Checkout:- https://github.com/Asymmetrik/ngx-leaflet/blob/HEAD/CHANGES.md
4. Install @types/leaflet package.
npm install --save-dev @types/leaflet5. Open src/styles.css and import leaflet.css
@import "~leaflet/dist/leaflet.css";6. Open app.module.ts and import LeafletModule
import { NgModule } from '@angular/core';
import { BrowserModule } from '@angular/platform-browser';
import { LeafletModule } from '@asymmetrik/ngx-leaflet';

import { AppComponent } from './app.component';

@NgModule({
  declarations: [
    AppComponent
  ],
  imports: [
    BrowserModule,
    LeafletModule
  ],
  providers: [],
  bootstrap: [AppComponent]
})
export class AppModule { }
7. Open angular.json and update assets.
...
"architect": {
    "build": {
      "builder": "@angular-devkit/build-angular:browser",
      "options": {
        "outputPath": "dist/angular-leaflet-maps",
        "index": "src/index.html",
        "main": "src/main.ts",
        "polyfills": "src/polyfills.ts",
        "tsConfig": "tsconfig.app.json",
        "assets": [
          "src/favicon.ico",
          "src/assets",
          {
            "glob": "**/*",
            "input": "./node_modules/leaflet/dist/images",
            "output": "assets/"
          }
        ],
this object
{
    "glob": "**/*",
    "input": "./node_modules/leaflet/dist/images",
    "output": "assets/"
}
8. Open app.component.ts and add the following code.
import { Component } from '@angular/core';
import * as Leaflet from 'leaflet';
Leaflet.Icon.Default.imagePath = 'assets/';
@Component({
selector: 'app-root',
templateUrl: './app.component.html',
styleUrls: ['./app.component.css']
})
export class AppComponent {
map!: Leaflet.Map;
markers: Leaflet.Marker[] = [];
options = {
layers: [
Leaflet.tileLayer('https://{s}.tile.openstreetmap.org/{z}/{x}/{y}.png', {
attribution: '© <a href="https://www.openstreetmap.org/copyright">OpenStreetMap</a>'
})
],
zoom: 16,
center: { lat: 28.626137, lng: 79.821603 }
}
initMarkers() {
const initialMarkers = [
{
position: { lat: 28.625485, lng: 79.821091 },
draggable: true
},
{
position: { lat: 28.625293, lng: 79.817926 },
draggable: false
},
{
position: { lat: 28.625182, lng: 79.81464 },
draggable: true
}
];
for (let index = 0; index < initialMarkers.length; index++) {
const data = initialMarkers[index];
const marker = this.generateMarker(data, index);
marker.addTo(this.map).bindPopup(`<b>${data.position.lat}, ${data.position.lng}</b>`);
this.map.panTo(data.position);
this.markers.push(marker)
}
}
generateMarker(data: any, index: number) {
return Leaflet.marker(data.position, { draggable: data.draggable })
.on('click', (event) => this.markerClicked(event, index))
.on('dragend', (event) => this.markerDragEnd(event, index));
}
onMapReady($event: Leaflet.Map) {
this.map = $event;
this.initMarkers();
}
mapClicked($event: any) {
console.log($event.latlng.lat, $event.latlng.lng);
}
markerClicked($event: any, index: number) {
console.log($event.latlng.lat, $event.latlng.lng);
}
markerDragEnd($event: any, index: number) {
console.log($event.target.getLatLng());
}
}
Note:- you can also use mergeOptions() method instead of imagePath property.
LeafLet.Icon.Default.mergeOptions({
  iconRetinaUrl: 'assets/marker-icon-2x.png',
  iconUrl: 'assets/marker-icon.png',
  shadowUrl: 'assets/marker-shadow.png'
});
In the above code, you also use custom icons.
9. Open app.component.html and add the following code.
<div class="map-container"
  leaflet
  [leafletOptions]="options"
  (leafletMapReady)="onMapReady($event)"
  (leafletClick)="mapClicked($event)">
</div>
10. Open styles.css file and add this css.
.map-container {
  height: 400px;
}
#Add a marker
const data = {
  position: { lat: 28.625043, lng: 79.810135 },
  draggable: true
}
const marker = this.generateMarker(data, this.markers.length - 1);
marker.addTo(this.map).bindPopup(`<b>${data.position.lat},  ${data.position.lng}</b>`);
this.markers.push(marker);
#Remove a marker
this.map.removeLayer(this.markers[index])
this.markers.splice(index, 1)
#Update a marker
this.markers[index].setLatLng({ lat: 28.625043, lng: 79.810135 });getIcon() - get marker icon
getLatLng() - get marker position
setIcon() - set marker icon
setLatLng() - set marker position
setOpacity(opacity) - set marker opacity
11. Finally run the project.
ng serve --oit will open http://localhost:4200 in the browser.

Extras:- Reverse Geocoding
12. Install leaflet-control-geocoder npm package.
npm i leaflet-control-geocoder13. Import leaflet-control-geocoder
import { Component } from '@angular/core';
import * as Leaflet from 'leaflet';
import "leaflet-control-geocoder";
14. Create a function.
getAddress(lat: number, lng: number) {
  const geocoder = (Leaflet.Control as any).Geocoder.nominatim();
  return new Promise((resolve, reject) => {
      geocoder.reverse(
          { lat, lng },
          this.map.getZoom(),
          (results: any) => results.length ? resolve(results[0].name) : reject(null)
      );
  })
}
You can use this function by passing lat and lng.
async mapClicked($event: any) {
  console.log($event.latlng.lat, $event.latlng.lng);
  const address = await this.getAddress($event.latlng.lat, $event.latlng.lng);
  console.log(address)
}
Checkout my full angular-leaflet-maps example.
https://github.com/ultimateakash/angular-leaflet-maps
If you facing any issues. don't hesitate to comment below.
Thanks.


Leave Your Comment