

How to Install Jitsi Meet on Ubuntu - Self-Hosted
Jitsi is a free and open-source multiplatform voice (VoIP), video conferencing for the web platform.
In this article, we gonna learn, how to install self hosted jitsi server.
- Jitsi meet requires at least 1GB RAM server to run properly. You can click this referral link to create an account at digitalocean to get $100 free credit.
- We also need a domain. you can purchase cheap-domain from hostinger.
Note:- Don't forget to create A record on DNS records that points to your server.
Ubuntu Version: 20.04
Log into your server via SSH and follow these steps.
1. Set hostname
sudo hostnamectl set-hostname meet.ultimateakash.techNote:- I have created a subdomain for this demo, you can also use primary domain.
2. Add official Jitsi repository.
echo 'deb https://download.jitsi.org stable/' | sudo tee /etc/apt/sources.list.d/jitsi-stable.list3. Import the Jitsi public key.
wget -qO - https://download.jitsi.org/jitsi-key.gpg.key | sudo apt-key add -4. Install apt-transport-https package.
sudo apt install apt-transport-https
5. Install Jitsi Meet
sudo apt updatesudo apt install jitsi-meetAfter hitting the command, you need to enter a hostname for your Jitsi server.
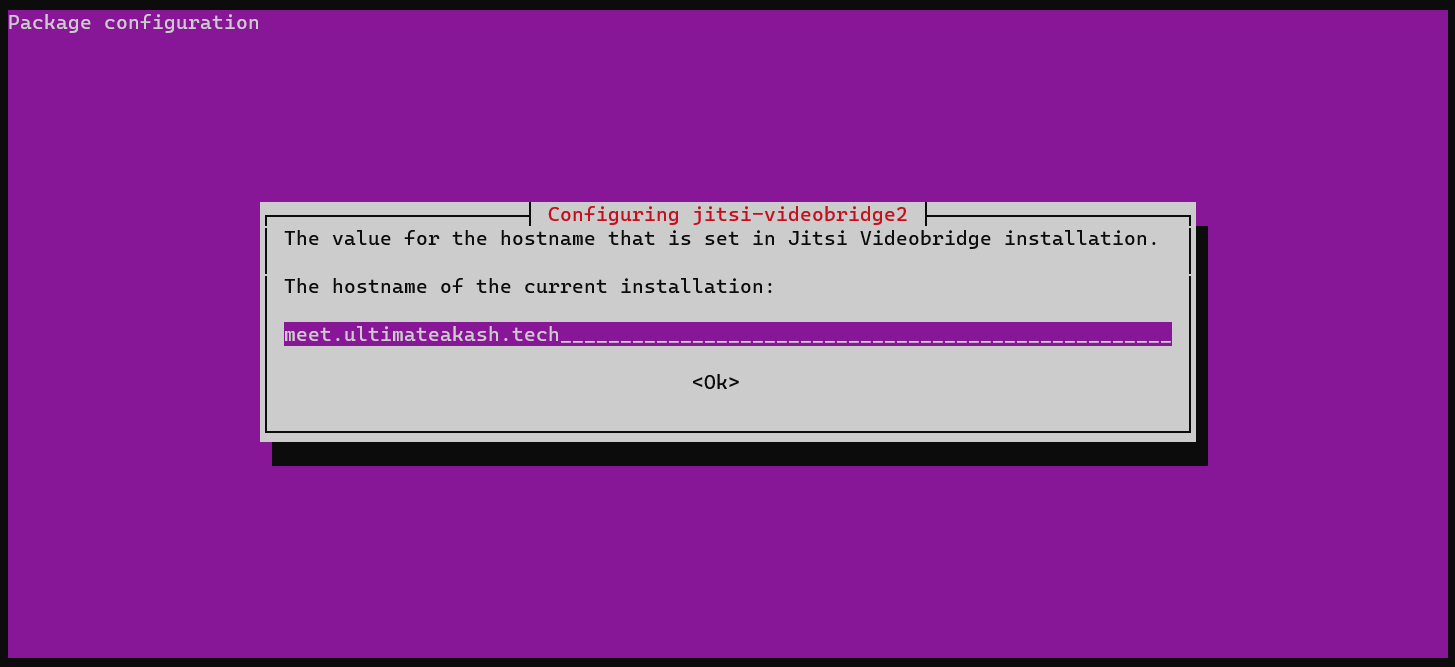
Fill your hostname then hit enter.
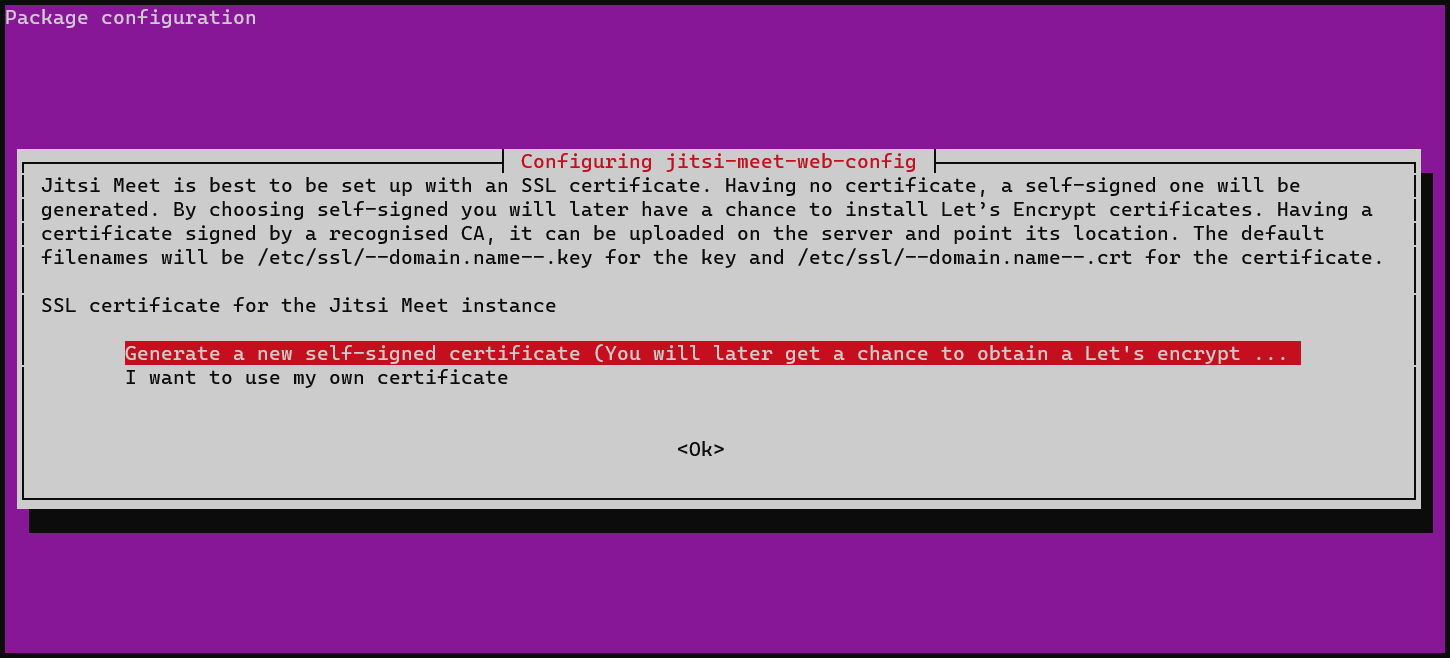
Next you will see ssl certificate screen. In this screen, select self signed certificate option and hit enter.
6. Verify jitsi-videobridge2 installation.
systemctl status jitsi-videobridge2

press q to quit the screen.
7. Open Ports in Firewall
sudo apt install net-toolssudo netstat -lnptu | grep java

sudo ufw allow 80,443/tcpWe also need to allow UDP port 10000 and 5000 for transfer video over the network
sudo ufw allow 10000,5000/udp
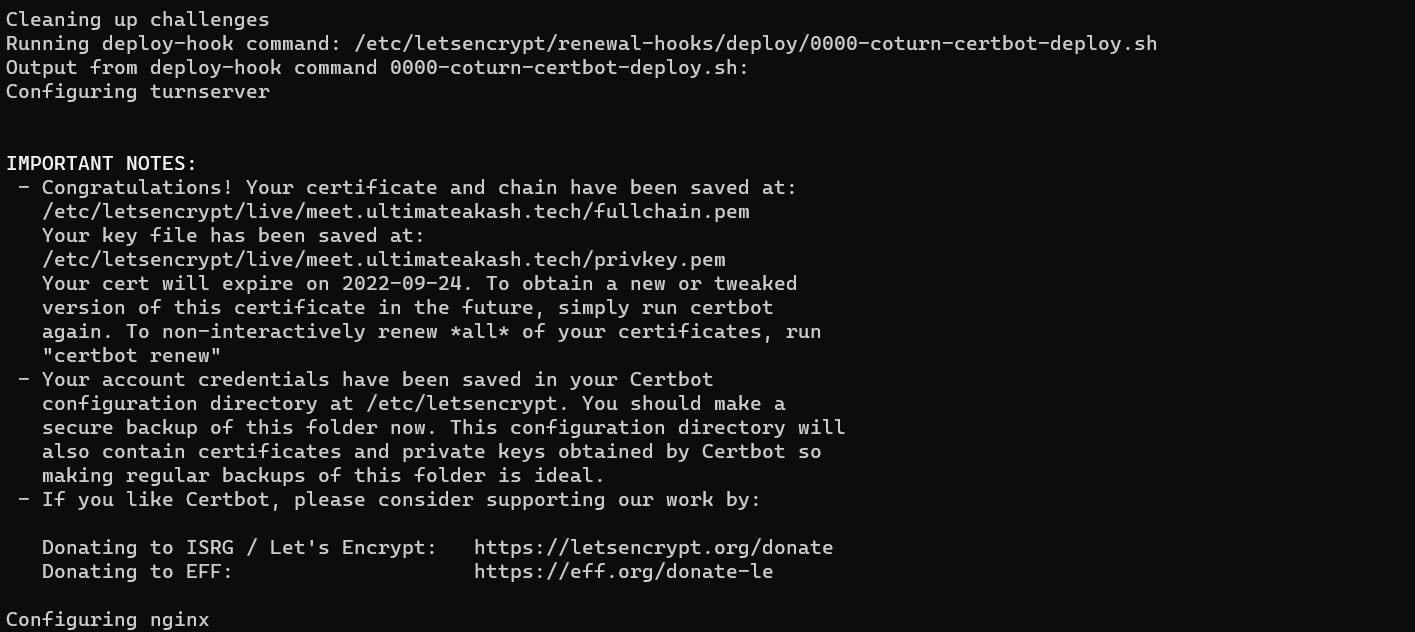
8. Obtain a Let’s Encrypt Certificate
sudo /usr/share/jitsi-meet/scripts/install-letsencrypt-cert.sh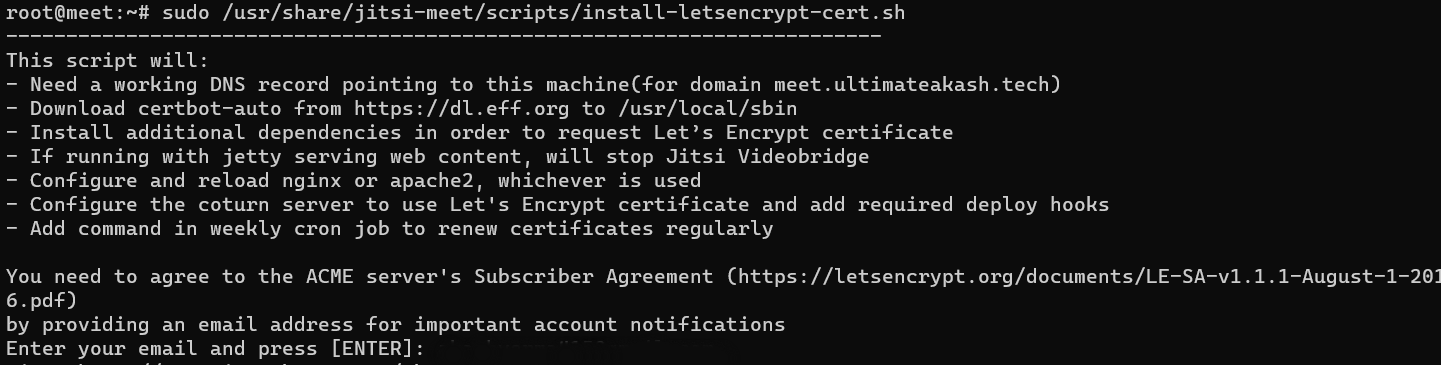
Enter your email and hit enter.
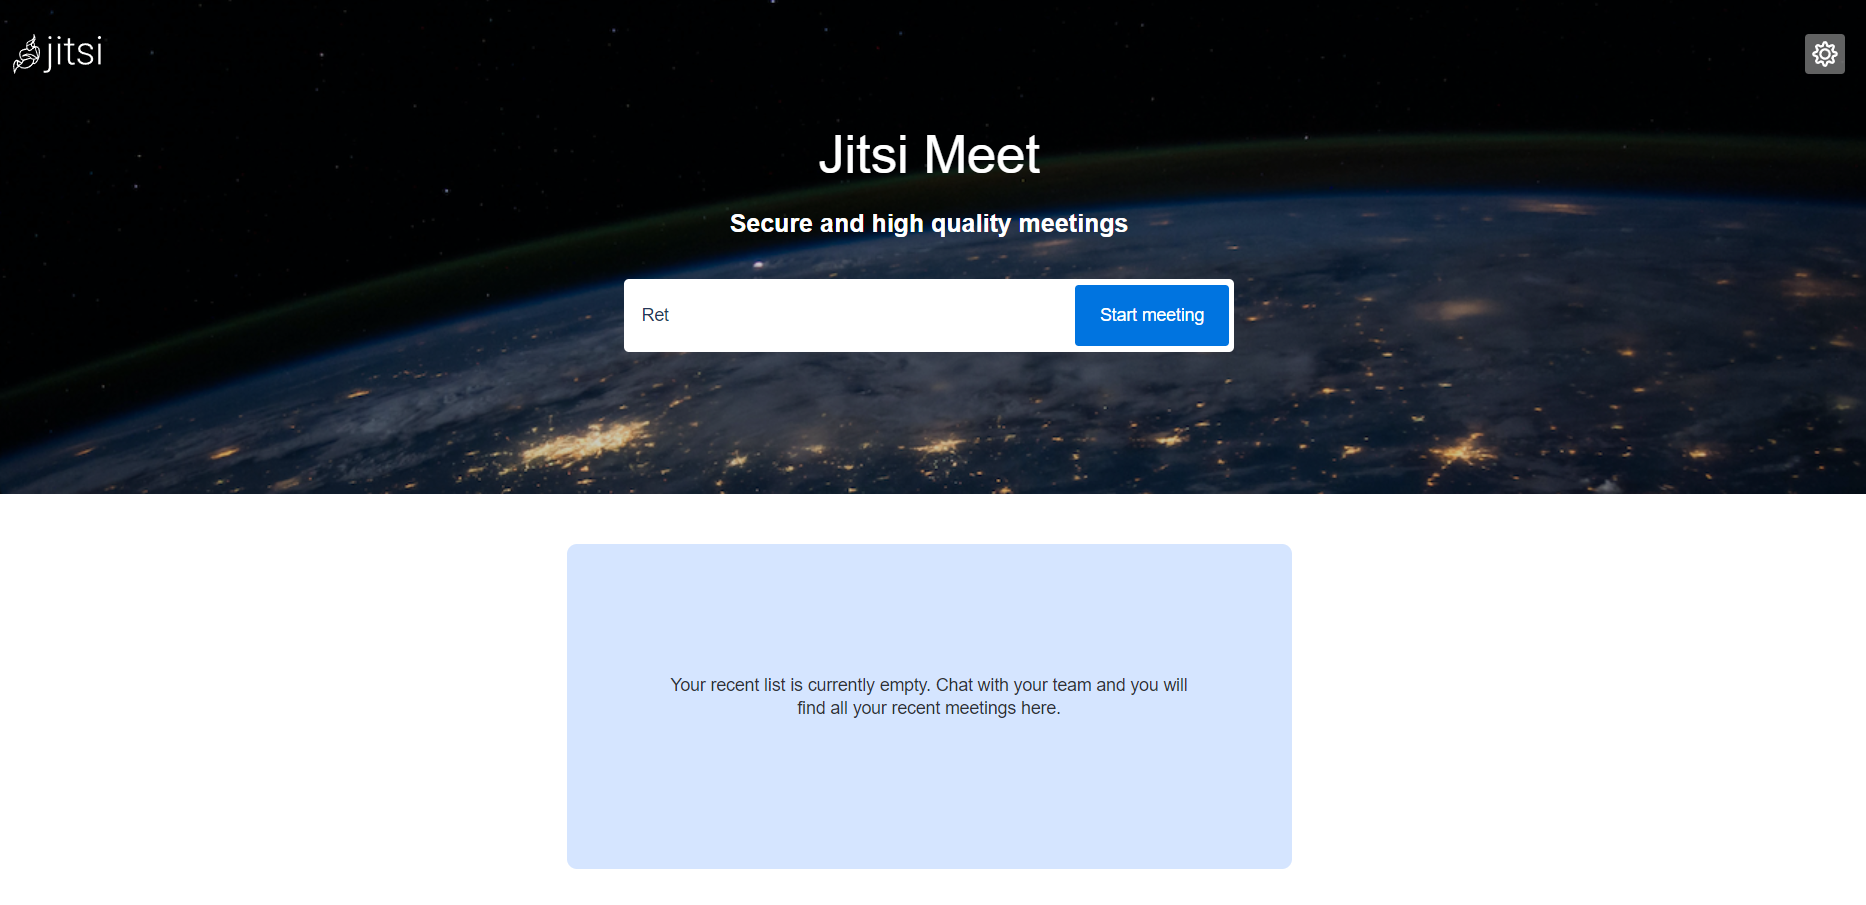
10. Finally our jitsi meet installation is completed successfully. open jitsi meet server link in the browser.
In my case https://meet.ultimateakash.tech
(Optional) - Improvements
11. Enable HTTP2 in Nginx
sudo nano /etc/nginx/sites-enabled/meet.example.com.conf
Find these lines
listen 443 ssl;
listen [::]:443 ssl;
add http2 at the end of the line.
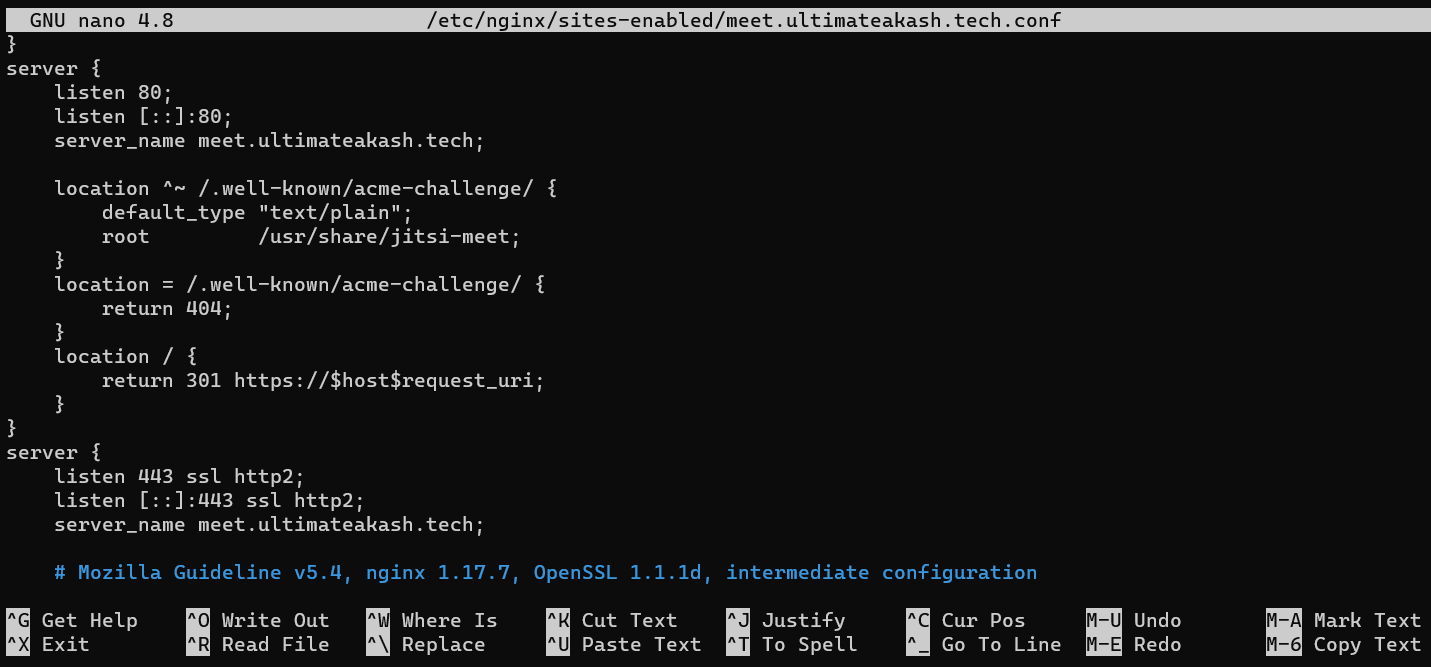
press ctrl + x then y
12. Reload Nginx for the change to take effect.
sudo systemctl reload nginx
Customization
Config File:- /etc/jitsi/meet/[your-domain]-config.js
/etc/jitsi/meet/meet.ultimateakash.tech-config.jsInterface Config File:- /usr/share/jitsi-meet/interface_config.js
/usr/share/jitsi-meet/interface_config.jsRemove Jitsi Logo
SHOW_JITSI_WATERMARK: falseYou can customize the jitsi by modifing the config files properties.
Samples files:
https://github.com/jitsi/jitsi-meet/blob/master/config.js
https://github.com/jitsi/jitsi-meet/blob/master/interface_config.js


Leave Your Comment